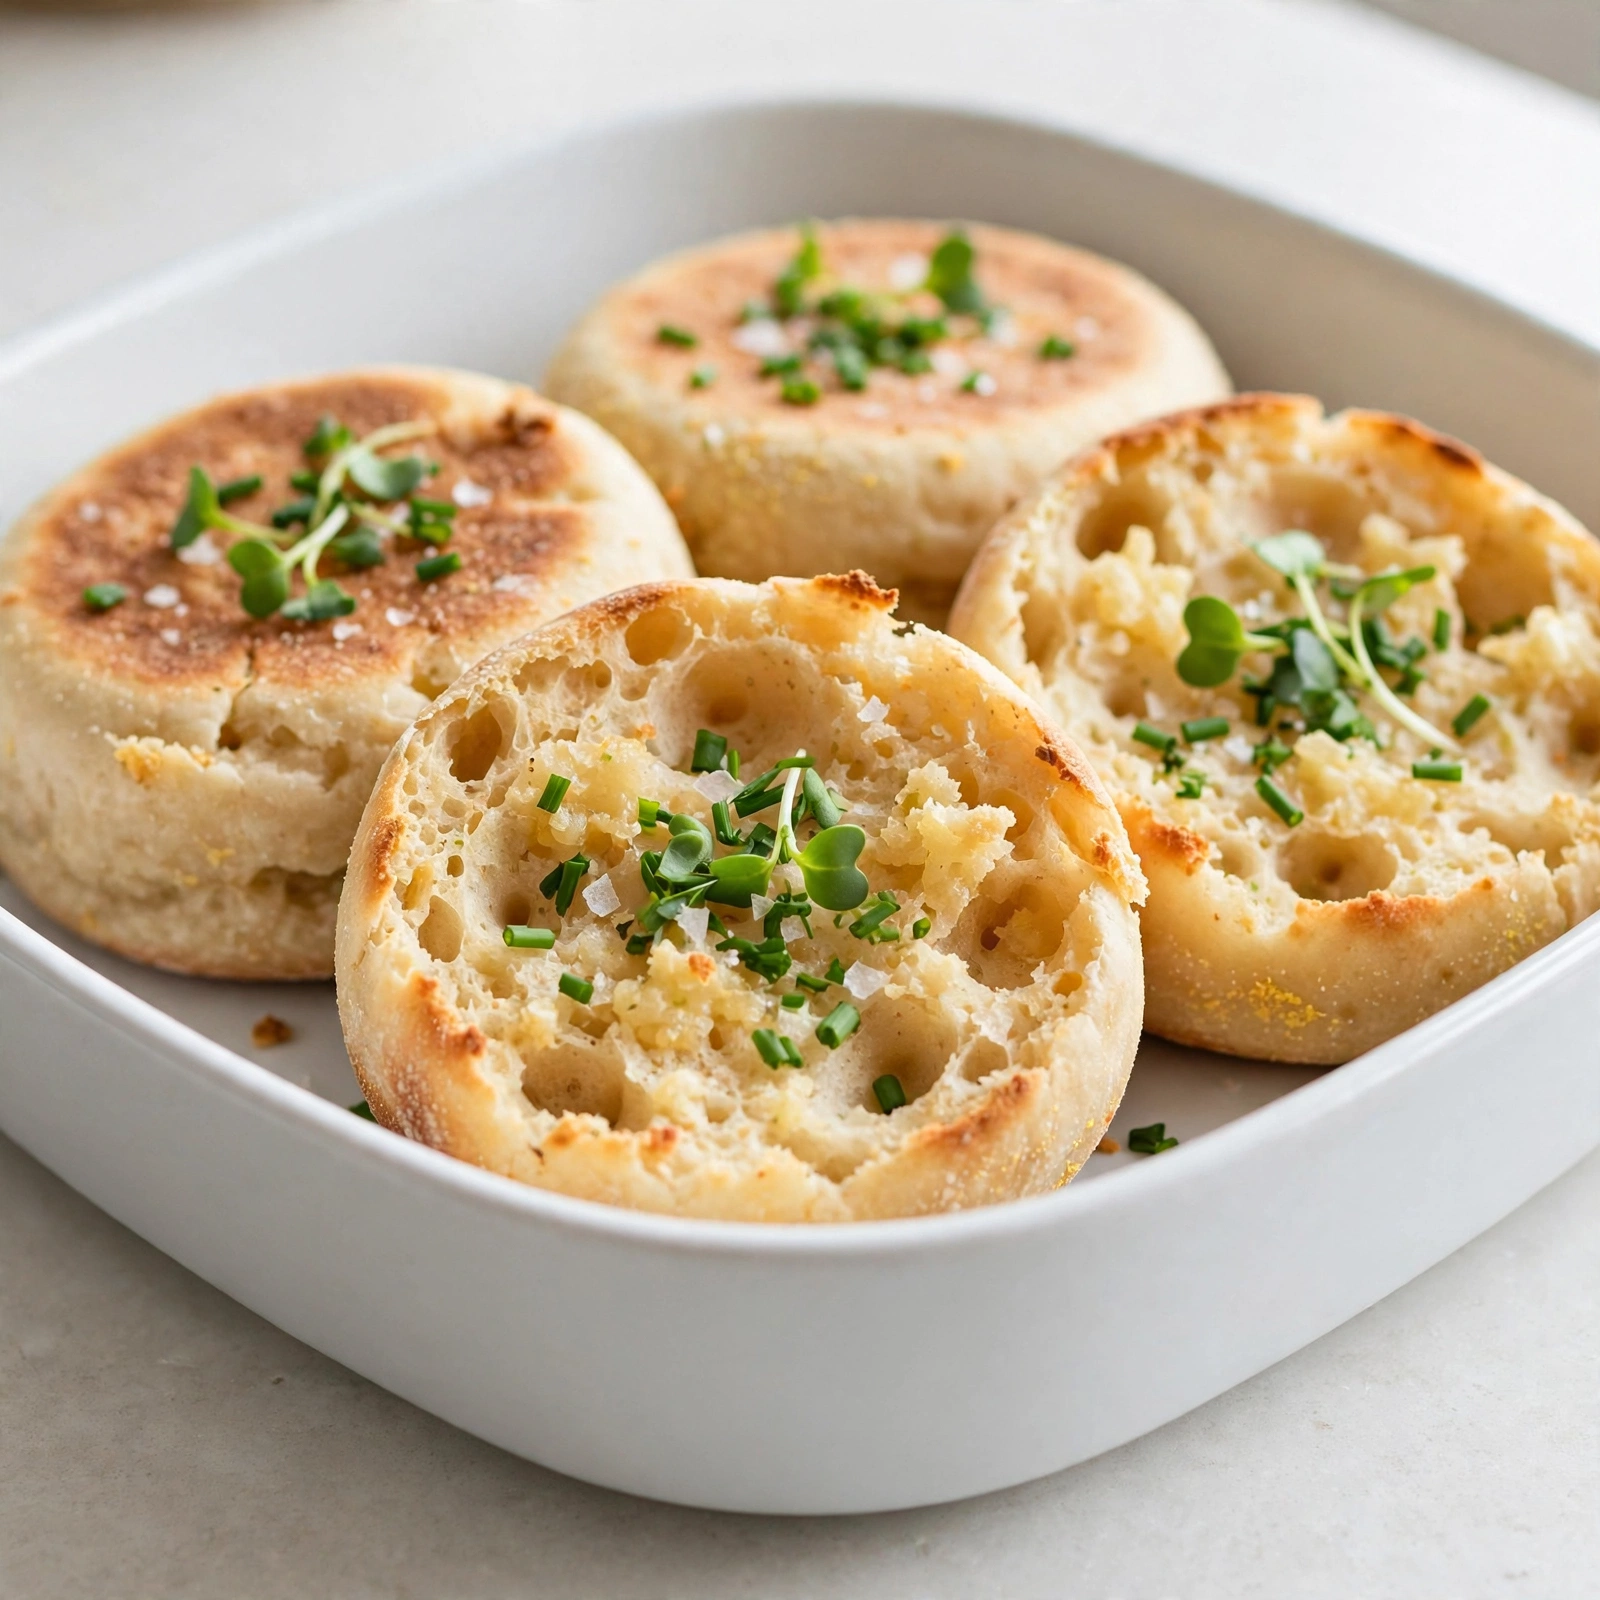
Homemade English Muffins
Fluffy, nook-and-cranny homemade English muffins made from scratch on the stovetop, perfect for breakfast sandwiches or slathering with butter and jam.
The Best Homemade English Muffins You Will Ever Make
There is something deeply satisfying about pulling apart a warm English muffin and watching steam rise from all those little nooks and crannies. If you have only ever known the store bought version, homemade English muffins are about to change your breakfast game entirely. This is a true from scratch breakfast recipe, made with basic pantry staples and cooked right on the stovetop, no fancy equipment required.
This recipe is one of those satisfying foods from scratch projects that feels a little bit like kitchen magic. You mix a simple, buttermilk enriched dough, let it rise, cut it into rounds, and griddle it low and slow until each muffin is golden on the outside and impossibly airy on the inside. If you have been searching for a reliable recipe for homemade English muffins, this is the one to bookmark.
Before we get cooking, the right tools and ingredients make a real difference here. A good heavy bottomed skillet or griddle helps the muffins cook evenly without scorching, and a proper biscuit or muffin cutter gives you those classic round shapes. These are the products that genuinely help this recipe shine:
Why Buttermilk Makes All the Difference
Many English muffin recipes lean on milk or even water, but this version calls for buttermilk, and for good reason. Buttermilk adds a subtle tang, helps tenderize the crumb, and reacts beautifully with the baking soda to give the dough a little extra lift. If you love recipes that include buttermilk, you already know it is a secret weapon for tender, flavorful baked goods, and English muffins are no exception.
Do not worry if you are working with an English muffin recipe no milk situation in your fridge. Buttermilk substitutes easily, and we cover that in the FAQ below.
Chef's Tip: Let your buttermilk and melted butter come to room temperature before mixing. Cold ingredients can shock the yeast and slow down your rise.
The Secret to Nooks and Crannies
The famous texture inside an English muffin comes from a wet, well hydrated dough and a gentle hand during shaping. Resist the urge to add too much extra flour while patting out the dough. A slightly tacky dough dusted generously with cornmeal is exactly what you want. The cornmeal is not just for flavor and crunch, it also keeps the dough from sticking as it rises and cooks.
If you have ever wondered how bakeries get that signature texture, this is it. It is the same principle used in many English muffin recipe for bread machine methods, just without the machine doing the mixing for you.
A Few Notes on Cooking Low and Slow
Unlike most quick breads, English muffins are cooked entirely on the stovetop. Patience is key here. A low to medium low heat allows the inside to cook through fully before the outside burns. Rushing this step with high heat is the most common reason homemade English muffins turn out doughy in the middle.
Chef's Tip: If your muffins are browning too quickly, lower the heat and finish them in a 350 degree F oven for 5 to 8 minutes to ensure the centers are fully cooked.
From Fresh Flour to Fresh Muffins
This recipe is a favorite among fresh flour recipes because it really lets simple ingredients shine. There is no long list of add ins or complicated techniques, just flour, buttermilk, yeast, and a little patience. Once you make a batch, you will understand why so many home bakers refer to these as their Oh My Gosh Muffins, the kind of recipe you cannot stop thinking about once you have tried it fresh off the griddle.
Ready to make it? Here is the full step by step recipe:
Homemade English Muffins
Fluffy, nook-and-cranny homemade English muffins made from scratch on the stovetop, perfect for breakfast sandwiches or slathering with butter and jam.
Ingredients
- 3 1/2 cups all-purpose flour, plus more for dusting
- 1 cup buttermilk, room temperature
- 1/2 cup water, warm, about 110 degrees F
- 2 1/4 tsp active dry yeast, 1 standard packet
- 1 tbsp granulated sugar
- 1 1/4 tsp fine sea salt
- 1/4 tsp baking soda
- 2 tbsp unsalted butter, melted and slightly cooled
- 3 tbsp cornmeal, for dusting the pan and muffins
Instruction
In a small bowl, stir the warm water, yeast, and sugar together. Let sit for 5 to 10 minutes until foamy on top.
In a large mixing bowl or stand mixer bowl, whisk together the flour, salt, and baking soda.
Add the buttermilk, melted butter, and the foamy yeast mixture to the dry ingredients. Mix with a dough hook or wooden spoon until a soft, sticky dough forms.
Knead the dough for 5 to 6 minutes, either by hand on a lightly floured surface or with a stand mixer, until smooth and slightly tacky but not overly sticky.
Place the dough in a greased bowl, cover with a damp towel or plastic wrap, and let rise in a warm spot for 1 hour, or until doubled in size.
Punch down the dough and turn it out onto a surface dusted with cornmeal. Pat it out gently to about 3/4 inch thickness.
Use a 3 inch round cutter (or a clean, empty can) to cut out muffins. Re-roll scraps gently to cut a few more.
Sprinkle a baking sheet or large plate with cornmeal, place the muffins on top, sprinkle more cornmeal over the tops, and cover loosely. Let rise for 30 to 45 minutes until puffy.
Heat a large skillet or griddle over low to medium-low heat and lightly grease it.
Cook the muffins in batches for 7 to 9 minutes per side, until deeply golden and cooked through, adjusting heat as needed to prevent burning before the inside is done.
Transfer to a wire rack to cool slightly before splitting with a fork to reveal the nooks and crannies.
Equipment
- Large mixing bowl
- Stand mixer with dough hook (optional)
- 3 inch round cutter
- Large skillet or griddle
- Wire cooling rack
- Kitchen towel or plastic wrap
Notes
Serving, Storing, and Make Ahead Tips
Once your muffins have cooled slightly, split them open with a fork rather than a knife. This preserves the craggy texture that makes English muffins so good at catching melted butter and jam in every crevice.
- Serve warm with butter and honey for a simple breakfast
- Use as the base for a classic eggs Benedict
- Toast and top with avocado for a quick lunch
- Slice in half for the ultimate breakfast sandwich bun
These muffins freeze beautifully, so consider doubling the batch. Split and freeze them in a zip top bag, then toast straight from frozen whenever a craving strikes. Once you have made your own, it is hard to go back to the packaged kind, and you will find yourself reaching for this recipe again and again.